The Importance of Septic Tank Pumping

A septic tank is a large concrete box that houses household waste. As wastewater leaves toilets, it flows into the septic tank. Bacteria in the tank break down the waste.

The force of gravity causes heavier masses to sink, creating a layer of sludge. Less dense masses, such as grease and oils, rise to the top and form a scum layer. Click the https://www.septictankarmadale.com.au/ to learn more.

Septic Repair and Replacement – Catskill Watershed Corporation

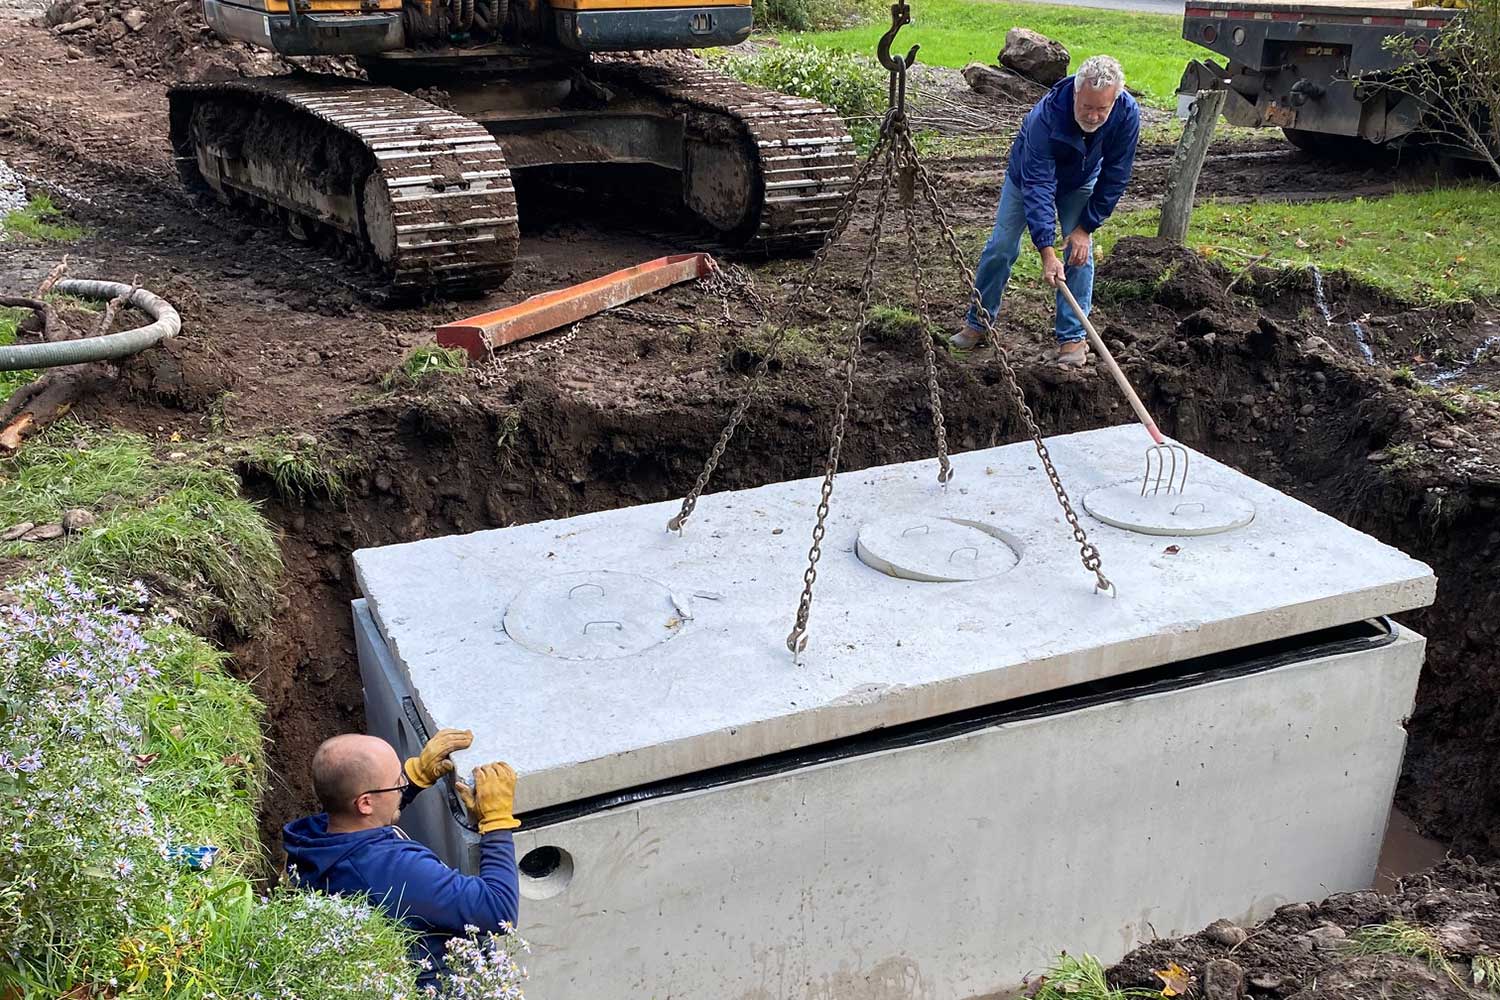
A septic tank is a watertight, underground container that houses your household waste. It’s designed to collect wastewater before it can enter your home plumbing, and to break down the waste so it can be safely absorbed into the soil. It consists of a large, concrete, or fiberglass tank, with an inlet and outlet tees at the bottom. The septic tank has walls that separate solids from liquids. Heavy materials such as toilet paper and feces sink to the bottom, while lighter materials like grease and oil float to the top. The septic tank also has a wall that keeps the liquid portion, or effluent, from flowing into the drain field and out through your toilets.

The septic system works by using a combination of the septic tank and a soil absorption field (drain field). The septic tank removes solids from the wastewater and stores them for later removal, while the drain field filters and treats the liquid effluent before it seeps into the groundwater supply. The septic system needs to be pumped and inspected on a regular basis to ensure it is working properly.

If you have a septic system, the most common sign that it is full is sewage backing up into your house. You may also notice a foul smell near or in your yard.

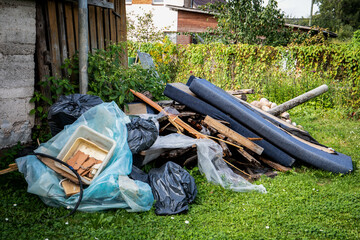
Keeping your septic system healthy includes being mindful about what you flush and not putting non-biodegradable items into it. For example, dumping cooking oils or pouring toxins into your septic system could kill the microbes that break down the waste and cause it to clog. You should also not plant trees or shrubs near your septic tank and drainage field as their roots can clog the system.

A regular inspection will tell you if your tank is getting close to full. You should have your septic tank pumped when it’s one-third full or more. The frequency of pumping depends on how much you use the septic system, how many people live in your home, and whether you have a garbage disposal. If you’re not sure how often to have your septic tank pumped, consult a professional.

Septic Tank Pumping

During septic tank pumping, a technician uses a vacuum truck to remove the sludge and liquid waste (effluent) from your home’s septic tank. This process helps prevent the tank from filling, which can lead to system failure, backups, and unpleasant odors. Ideally, homeowners should schedule septic tank pumping every three to four years, but this can vary based on septic tank size, home usage, and other factors. Signs of a full septic tank include slow drains, water pooling near the septic tank or drain field, and sewer odors in the house.

Your septic tank processes wastewater in two stages: solid waste sinks to the bottom of the tank, while lighter materials float to the top. The clear liquid between these layers is known as effluent and flows into your drain field for soil filtration. Unfortunately, even though wastewater is largely broken down by anaerobic bacteria, solid waste will accumulate in your septic tank over time. When this occurs, the sludge layer can reach critical levels and reduce the amount of space available for new wastewater.

As solids settle in your septic tank, they will also flow into the distribution box and into the absorption trenches. Over time, these solids can accumulate and block the absorption fields, causing them to fail or overflow. The best way to avoid these problems is to have your septic tank pumped periodically, as well as to limit the amount of non-biodegradable solids and slow-biodegradable organics added to the system.

When septic tank pumping day arrives, technicians locate and expose the access ports before connecting powerful vacuum equipment to the tanks. The tank-mounted system draws out the sludge and liquid waste, which is then transported to a nearby sewage treatment facility for processing and disposal. Some companies offer a detailed system check during the pumping process, in which they inspect tank baffles, walls, and distribution box for signs of problems. This hands-on inspection is an effective tool for catching problems before they become costly or dangerous.

To help the service provider work more quickly, homeowners can prepare by clearing the area around the septic tank and removing any vegetation that might be covering the tank or inspection ports. It is also a good idea to mark the location of the tank, ports, and the drain field for future reference.

Septic Tank Inspection

A septic tank inspection is one of the most important steps in determining a home’s plumbing system health. This process can help detect and diagnose septic tank issues, such as cracks and leaks, that might be causing effluent to contaminate the soil or water supply.

A basic septic system has two compartments that collect and ferment solid waste before dispersing into the drain field for absorption. A baffle wall, sanitary tees, and filter keep the solid waste from clogging the drain field (older tanks did not have this). The inspector will visually inspect the septic tank for signs of a leak or crack as well as check the D-box to make sure that wastewater is flowing correctly. The inspector will also look for puddles in the yard, which indicate improper wastewater drainage.

The inspector will test the septic system by flushing toilets and running faucets to see how much water the tank can handle in 24 hours. This will help to determine if the tank is full or if it is leaking and the system needs to be pumped. The inspector will also use a dye to determine if the leach field is working correctly. The dye shows up in the soil to tell if the septic system is absorbing the effluent.

During a septic tank inspection, the inspector will probe for and uncover any buried septic tanks and pump chamber covers. This is typically done with a metal rod that can be inserted into the ground. It is best to do this gently, since the tank components are fragile and can be easily crushed. If the inspector can locate the tank cover or pump chamber without digging, this will reduce the inspection time and cost.

Some inspectors will also use a camera to get a closer view of the interior of the septic tank. This is usually a more costly add-on, but can be worthwhile if there are signs of trouble such as odors or standing water in the yard.

A septic tank inspection should be performed by a qualified septic system technician and should be scheduled to coincide with the general property inspection. The septic tank and system should be inspected before any offers are made on the property, as it is important to have this information for potential buyers. If the system is found to be in poor condition, it can lead to a delay in the closing of the real estate transaction and may even cause the buyer to walk away from the deal.

Septic Tank Repair

The septic tank plays a vital role in the overall home plumbing system, capturing solid waste and directing liquid wastewater to a drain field for safe absorption or evaporation. If the septic tank becomes clogged, or the drainage field fails to function properly, sewage may back up into the house, contaminating the plumbing fixtures and posing serious health risks to family members and guests.

When you need septic tank repair, the first step is to have your septic system professionally inspected. Then, the professionals can diagnose and recommend the best course of action. A qualified septic tank professional can also help you determine whether or not your tank needs to be replaced.

The size of your septic tank and the material it’s made from can have an impact on repair and replacement costs. For example, a plastic septic tank is typically less expensive to repair than a concrete one. But, it can be more susceptible to damage and cracking based on the soil conditions surrounding the tank.

Other factors that influence septic tank repair cost include the age of your tank and how extensively it’s damaged. Minor damage like cracks or leaking can be repaired, but if your tank has suffered significant structural damage, it might be better to replace it instead.

If you’ve been away from your home for a long time, the bacteria that break down the waste in your septic tank may die off. This can lead to a buildup of sludge and scum, so it’s important to pump your tank regularly.

Another common septic tank repair is replacing the septic tank lid. If the lid is damaged, it allows sludge and scum to reach the drainfield, which can clog and overflow. This exposes the ground to disease-causing bacteria and can be dangerous for humans and pets.

Other common septic tank repair services include replacing the septic tank baffle, cleaning or repairing the drainfield, and fixing any damage to the distribution box. A distribution box that’s compromised by a broken baffle or cracked lid can lead to clogs, overflows and system failure. Replacing this component is crucial for efficient septic tank operation.

Junk Removal

What You Need to Know About Junk Removal

When junk piles up, it’s important to have a professional junk removal company take care of it. This will free up time for the family or business to spend on more productive tasks.Junk Removal

A professional junk removal service will know what can be recycled or reused to reduce the amount of trash that ends up in landfills. This saves the environment and also helps to keep prices low. Contact Junk Removal Mesa AZ for professional help.

When clearing out junk, it is important to take safety measures. The use of personal protective equipment such as gloves, safety goggles and masks can prevent injuries and exposure to harmful substances during the junk removal process. Additionally, it is a good idea to familiarize yourself with local disposal regulations so that items, such as electronics and appliances, are disposed of properly. Finally, it is a good idea to disinfect any surfaces, floors, or walls exposed to waste residue. This will minimize mold growth and bacterial exposure.

Clutter is a major safety risk in homes and can cause accidents, including falls. It can also obstruct pathways and create fire hazards. It is a good idea to make junk removal a regular part of your home maintenance plan, and schedule it at least once per month or season. This will help reduce the amount of clutter in your home, enhance mobility, and prepare your household for emergencies.

It is also a good idea to sort your junk into categories before hauling it away. This will make it easier for the junk removal company to identify and load items quickly. It is also a good idea to donate items instead of throwing them away, as this can be more environmentally friendly.

Before hiring a junk removal service, it is a good idea to check their credentials and references. You should also make sure that they are licensed and insured. In addition, a reputable company will give you an estimated time of arrival and call you when they are on their way. This will allow you to plan your day accordingly.

Junk removal can be a complicated task and requires proper training. Hiring a professional junk removal service will ensure that your property is safe and that the job is completed efficiently. The professional will know what types of items can be recycled or donated and how to dispose of them in a safe manner.

Junk removal is a necessary step in the recovery process after natural disasters like floods and fires. The debris and damaged belongings left behind must be removed quickly to avoid additional damage. This process can be difficult and time-consuming, but it is essential for restoring your home and ensuring the safety of family members.

Time

Junk removal is a time-consuming, laborious task that requires a lot of physical effort and organization. It is important to set realistic expectations and pace yourself. A good strategy is to break the project into manageable tasks, and schedule them in a way that suits your lifestyle. Creating timelines for each task will help you stay on track and ensure that your project is completed on time.

Using the right tools for junk removal can help you save time and money while also protecting your health. When working with heavy objects, sharp edges, or machinery that is not well-maintained, you may be at risk for accidents and injuries. In addition, improper tools can damage your property and make the job more difficult.

Another problem that occurs in cluttered spaces is the loss of items. Whether it is papers, old files, or electronics, it can be frustrating to spend hours searching for a specific item. This problem can be avoided by organizing your workspace and reducing the amount of clutter.

If you have a lot of unwanted stuff, you can donate it to charity or sell it for cash. However, it is essential to take the time to sort out your belongings before you donate or sell them. This will ensure that you do not donate anything that can be used for other purposes.

It is also important to consider the environmental impact of your junk disposal choices. Many items can be recycled, including paper, glass, plastics, and metals. You should also be aware of the local recycling guidelines in your area.

In order to recycle your junk properly, you must sort it and clean it before donating or throwing it away. This will reduce the amount of waste that is sent to landfills. Additionally, it will allow you to get more value for your old stuff.

If you have a large amount of trash to get rid of, a professional junk removal service is the best option. It will save you a lot of time and money. You can also use an online tool like TaskRabbit to find a trusted junk remover in your area.

Local dumping laws

Aside from the obvious environmental impact, illegal dumping can lead to health issues and financial losses for communities. It is important for local governments to use a combination of community awareness, education, and enforcement to combat this problem. Various methods can be used to catch and punish offenders, such as establishing a database of vacant lots, increasing surveillance in hot spots, and encouraging reporting. Some cities also offer rewards for tips that result in convictions. The key to effective enforcement is to make it as easy and convenient as possible for citizens to report dumping.

One way to reduce the number of items being dumped is to educate residents on green options. This can be done through a variety of ways, including setting up a website or phone line for reporting violations, creating educational campaigns, and promoting recycling programs. In addition, communities should encourage residents to participate in junk removal activities and organize clean-up events.

Local regulations can be strengthened by imposing fines and penalties for littering and dumping. These laws should clearly define the penalties and responsibilities of property owners and waste disposal businesses. In addition, local governments should collaborate with state and federal agencies to enforce environmental regulations and address large-scale illegal dumping operations.

Illegal dumping can harm the environment and cause health issues for people who live, work, or visit the area. In addition, it can degrade scenic areas and discourage tourism. To address this issue, many communities are implementing innovative programs to combat littering and dumping.

If you are looking for a hassle-free way to get rid of your unwanted junk, consider hiring a professional junk removal service. The professionals are experienced in dealing with different types of trash and will ensure that the items you dispose of are recycled. Additionally, the company will dispose of any hazardous materials properly and comply with local dumping laws.

Environment

Junk removal is a vital component of urban planning and environmental stewardship. It reduces the amount of waste that ends up in landfills and helps conserve natural resources. It also prevents pollution caused by improper junk disposal, which can pollute the soil and water supplies. For example, burning junk can release harmful chemicals into the atmosphere, while dumping hazardous materials can leach contaminants into the groundwater supply.

Many items that end up as junk can be reused or recycled. For example, paper, plastics, metals, and glass can be transformed into new products to save energy and resources. They can also be composted to improve soil quality and reduce methane emissions from landfills. Another option is to donate or sell unwanted items to people in need. Many charities and online platforms allow you to donate or trade your used goods.

Cluttered living spaces can harbor bacteria, dirt, dust, and allergens that affect health and well-being. In addition, a messy home can cause stress and anxiety. A clutter-free environment can improve indoor air quality and make it easier to find things in your home. It can even help you sleep better and reduce the risk of depression.

The Johnsons had accumulated a lot of junk over the years. Their attic and garage were cluttered with old furniture and boxes of miscellaneous items. When they hired a junk removal company, the professionals sorted through the clutter and discarded flammable materials. Then, they recycled as much as possible. The result was a clean, organized space and a healthier lifestyle for the whole family.

Junk hauling companies are a crucial part of sustainable waste management practices. By reducing landfill waste and encouraging recycling, they promote responsible waste management. They also play an important role in urban renewal projects, ensuring that construction waste is properly disposed of.

Junk removal is an essential step in achieving a greener and more sustainable city. Whether you’re clearing out your attic or cleaning up after a renovation project, a junk removal service can keep your neighborhood safe and beautiful while protecting the environment.

carpet cleaning

Carpet Cleaning Basics

Carpet cleaning is a necessary chore for all homes with carpeting. Daily maintenance includes vacuuming to remove loose soil and pretreated stains with a carpet spray cleaner. When treating a stain, resist the temptation to scrub; that only drives the stain deeper into the fibers.

Professional carpet cleaners also use advanced odor-neutralizing solutions to eliminate lingering odors that can attract pets and other unwanted guests. Click https://www.joondalupcarpetcleaners.com.au/ to learn more.

carpet cleaning

Vacuuming is one of the most important steps in caring for carpeted floors. The ideal vacuum cleaner for carpet should have reliable suction power and a brushroll that digs deep into the pile to lift away dirt and debris. The beater bar should also be set at a height that allows it to properly engage the carpet pile without grinding or fuzzing the fibers. If your vacuum does not have these features, it may be worth investing in a new model.

In addition to a thorough vacuuming, a good preventative maintenance routine should include regular spot cleaning and pretreating of stain areas. When spotting, always use cold water to treat the area to avoid over-saturating and causing the stain to set. For pre-treatment, mix baking soda and salt to make a paste that can be rubbed into the carpet to elicit a chemical reaction with the soil. This will break down and loosen the soil to be easily lifted by the vacuum or mop.

If you have an odor problem, sprinkle the carpet with baking soda and leave it to sit for an hour before vacuuming. The resulting reaction will neutralize the smell and absorb any remaining soil. If your carpet has stains that are difficult to remove, a professional cleaner may be necessary. Always consult a stain removal chart to find the best cleaner for your particular needs.

As a final preventative measure, a carpet protection mat should be placed in entryways and lobbies to trap the dirt that would otherwise be tracked into carpeted rooms. When vacuuming, remember to move slowly and with overlapping strokes to prevent damage or “uglying out” your carpet.

Carpets in offices, schools and hospitals require a cleaning program to help keep them looking good and hygienic. Having a routine preventative maintenance schedule helps extend the life of carpet, improves indoor air quality and lowers facility management costs.

Routine preventative maintenance includes daily vacuuming and interim low-moisture cleanings. High-traffic areas need to be cleaned more frequently than less-used rooms. Carpeted stairs also need regular attention to prevent soil accumulation.

Daily vacuuming removes loose dirt and debris that is trampled into the fibers by foot traffic. If left too long, these embedded soils can make vacuuming more difficult and cause carpet to look dull or dingy. Vacuuming should be done with a strong suction machine that is designed for your carpet type. A model without a beater bar (a rotating brush or scraping bar) is recommended for loop pile and wool blend carpets to avoid excessive agitation and damage to the fibers.

Oily soil from cooking vapors, air pollution and tracked-in dirt can create an oily film that dulls color and attracts more dirt. This type of soil requires special cleaning chemicals to break down the oil and dissolve it. Regular spot treatment with general spot cleaners, mild detergents with encapsulating properties and neutralizing or brown-out chemical treatments can help keep these types of spots at bay.

If you spot a stain, treat it as soon as possible to limit the amount of time that the stain has to soak into and saturate the fibers with moisture. Blot the spot with paper towels to absorb as much of the stain as possible. Then, apply a water-based or solvent spot removal product to the spot. Use a commercial carpet stain removal product or one of the many over-the-counter products available. Blot the spot again and if necessary repeat the process until the stain is completely removed.

Using walk-off mats at entrances to trap soil and prevent it from being tracked inside is another great preventative measure. In addition, a quality carpet pad adds resilience and comfort underfoot, prolonging carpet life.

When stains occur, they must be treated quickly to reduce the appearance of the spot and prevent the stain from becoming permanent. This is known as spot cleaning and focuses on treating specific areas or stains without affecting the surrounding carpet fibers. Spot cleaning is especially helpful for immediate accidents and older stains that may not have been addressed during previous cleanings.

It is important to have an arsenal of tools and spotting products on hand for effective care. Depending on the type of stain, different cleaners and removal techniques are required. Some stains may be removed by using a dry cloth, while others need to be rinsed with water and then blotted until no more stain is visible. It is also important to keep in mind that the use of a white cloth is recommended for blotting because any color residue from the rag could transfer to the carpet and cause the stain to appear worse.

For most spots, a carpet spotter solution is the best choice. It should be diluted according to product instructions, and staff should be trained to test the solution on an inconspicuous area of the carpet to make sure it is safe for colorfastness. After the spotter is applied, a clean white cloth should be used to blot it until no more soil can be pulled up. Then, the carpet should be rinsed with clear water and blotted dry. The blotting process is important because it will help to remove any soap residue that may be trapped in the carpet fibers and can cause resoiling.

Once a spot is cleaned, it should be blocked off to keep people from walking on it while it dries. Putting something like a dinner-table chair over the stain or placing it in front of a fan can help speed the drying process. It is also important to place a dry towel over the area so that the carpet fibers do not absorb any remaining moisture.

Keeping up with routine carpet maintenance and cleaning can prevent the need for more extensive work in the future. However, for those times when a deeper clean is necessary, professional carpet cleaning can leave your flooring looking its very best.

Carpet that has been damaged by severe soiling requires restorative cleaning. This is a specialized process that includes more steps than general maintenance cleaning and addresses specific problems like matting, heavy soils, smoke damage, pet stains and odors, and other difficult-to-remove issues. To ensure a successful restoration, the root cause of the problem needs to be determined. Then, the appropriate restorative cleaning techniques can be selected.

The first step in the restorative cleaning process is to thoroughly vacuum the entire carpet using a commercial-grade vacuum cleaner that has suction only. This helps remove dry, loose soil from the surface of the carpet and prevents re-soiling.

Next, a pre-treatment liquid is applied to the carpet. This solution may contain a solvent or alkaline, which breaks down the oily residues that cause stains. This is followed by agitation, which is done using mechanical agitation tools or brushes that help dislodge deep-seated dirt and stains from the carpet fibers. Then, the carpet is shampooed or steam cleaned. If there are any set-in stains, spot treatments may be used to treat them. Once the carpet is clean, it should be allowed to dry. The drying time can vary depending on the method of cleaning, indoor humidity levels, and outside weather conditions. In order to speed up the drying process, fans should be used and windows opened to promote air circulation.

Once the carpet is dry, a protectant can be applied to repel stains and extend the life of the carpet. Entry mats can also help decrease soiling by limiting the amount of dirt that is tracked into the building from shoes. The best way to reduce the need for restorative cleaning is to use a preventative cleaning system like PDIR, which involves regularly scheduled maintenance cleaning and regular monitoring of moisture levels in the flooring. This can significantly reduce the need for more intensive, costly restorative cleaning and keep your carpet looking newer, longer.

Stucco Repair

Stucco Repair: Common Problems With Stucco

Stucco Repair Philadelphia is the fixing of surface-level damage, such as chips and cracks. It’s important to speak with a stucco professional so they can identify the root cause and recommend remediation if necessary.Stucco Repair

Gaps around windows, doors, and other openings indicate moisture penetration into the wall, which can lead to mold growth, moss, wood rot, and structural problems. Remediation involves replastering the walls to address the underlying issue.

Hairline cracks that appear on a stucco wall are usually not a major concern, but they can be repaired easily with waterproof caulking. However, larger cracks can point to more serious issues with the foundation or water damage and should be addressed by a professional stucco repair company that offers comprehensive services.

Regardless of the severity of a crack, it is important to address it immediately to prevent precipitation from seeping behind the stucco and damaging the home’s structure. To begin, the homeowner should clean out the crack and surrounding area to remove any dirt and debris that has accumulated. This step will also help ensure that the waterproof caulk or patch will adhere properly and will not come undone in the future.

Once the crack has been cleaned, a layer of waterproof caulking should be applied along the entire length of the crack using a standard caulking gun. The caulk should be troweled to match the texture of the surrounding stucco, ensuring a smooth transition. Once the caulking is dry, the homeowner can cover it with water-based paint, preferably in the same color as the home’s exterior.

For a more permanent solution, a special waterproof compound can be used to repair stucco cracks. These products are typically available through a stucco supplier, and they are prepared by mixing one part of a liquid concentrate with two parts water. The product will then form a tan emulsion that can be applied to the cracked areas of the stucco.

Homeowners can choose to apply the damp concrete primer with a brush or roller, but a narrow brush is best to avoid any unnecessary mess. Once the liquid is applied, it will soak into the small, medium, and large pores of the stucco or concrete and create a waterproof barrier that will protect the structure for years to come. Alternatively, a conventional stucco repair mix may be used to remedy larger gouges and holes, but this mixture should not be used for hairline cracks as it is not sufficiently durable.

Repairing Holes

Stucco is a versatile material that can be used for many different projects, including home siding. If you’re interested in using stucco for your next home project, it is important to be aware of common problems that can occur with the material and how to fix them. These issues can range from minor cracks to major holes in the stucco. When addressing holes, you should always hire a professional contractor to help. However, with a bit of knowledge, you can save yourself some money by completing the repair yourself.

When addressing small to medium-sized holes, you can often use a pre-mixed stucco patch that is available at most hardware stores. This product can be used to fill in holes, spalls, and breaks in stucco walls up to one-quarter inch wide. The patch is a convenient option because it requires no mixing and dries to a durable finish that matches the texture of the surrounding stucco.

For larger holes, you will need to follow a slightly more complicated process. First, you will need to remove any broken pieces of stucco. If there is a lot of broken stucco, you may need to chip it away with a hammer and chisel. Once you have removed the damaged stucco, you will need to clean the area with a wire brush and blow away any dust. You should also be sure to wear protective work gloves and safety glasses.

Once you have cleaned the area, you will need to apply a base coat to the wall to prepare it for the stucco patch. The base coat will also need to dry completely before you can start working on the hole. Next, you will need to add a second layer of stucco. Once again, you will need to make sure that the second layer of patch is pressed firmly into place and that it fills the hole.

Depending on how large the hole is, you may need to add a third and final layer of stucco. Once you have completed the patch, you will need to sand it down and paint it a color that matches the rest of the wall.

Remediating Cracks

Many homeowners find themselves with hairline cracks in their stucco. Unlike larger structural cracks, these surface-level cracks are not serious and can be easily repaired. In order to repair these cracks, it is important to determine the degree of damage. If the cracks are only in the plaster, then it is possible to use a concrete patching mix and a float to fill them and even them out with the surrounding, undamaged area. Once the new plaster dries, it can then be painted to match the color of the rest of the stucco.

If the cracks are deeper into the stucco, a more extensive process is needed to fix them. This process is called remediation. Remediation is a much more involved project and should be left to professionals. If the cracks are in the sheathing or framing, it is necessary to replace the water-damaged sheathing and framing material. This can also include the replacement of insulation and drywall. In some cases, this can be a much more costly process, but it is essential to the long-term integrity of your home.

The first step in repairing these deeper cracks is to remove the cracked stucco and any debris from the damaged area. It is also a good idea to remove any wood lath material that is still attached. Once this is done, it is important to clean the area and use a damp sponge to wipe away any loose dirt or dust that may be present. This will help ensure that the new plaster will bond well with the existing material.

Once the cleaned area is dry, it is important to use sanded caulk to fill in any gaps that are present. This is best done in the morning, when a house will be cooler, and this will help prevent the cracks from widening later on.

It is also a good idea to use a paint or fog coat that matches the texture of your stucco. This will help the repaired area blend in and look more natural. Lastly, it is a good idea to have the property inspected on a regular basis by a professional. This can be done by using a moisture meter, a borescope, and other non-invasive tools.

Remediating Holes

Small cracks and holes in stucco are a common occurrence that is often easily remedied. This type of damage is typically caused by outside forces such as wind or water and is a surface-level issue that is easy for most homeowners to tackle without calling in a professional.

For small, thin hairline cracks and holes that measure less than 1/16 of an inch in width, homeowners should use waterproof caulking to fill them. Caulking is an inexpensive and quick fix that can be completed in about a half hour. This repair will be able to accommodate changes in temperature without causing further damage or cracking in the stucco.

If the crack or hole measures larger than this, it will need to be patched with a stucco mix. Using a putty knife or drywall trowel, apply the premixed stucco patching material to the area. For best results, it is recommended that the patching material be applied in multiple layers and allowed to dry between each application. Once the patch is completely dry, it can be painted to match the existing stucco.

To address larger cracks and holes in the stucco, homeowners should first brush or vacuum the crack to remove any dirt or algae. Then, with a cold chisel and hammer, widen the crack up to about 1/4-inch wide and bevel it on both sides. Afterwards, the crack should be smoothed with a sanding tool to prepare it for repair.

Once the damaged areas have been prepared, a new coat of stucco should be applied. A sand-based mix that matches the existing texture is best for this task. For a better finish, a float can be used to smooth the layer and create a uniform appearance. After the stucco is complete, it should be allowed to cure for about a week before it can be painted.

Remediation and repair of stucco can be a time-consuming project, but with the right materials and proper preparation, it is more manageable than some may think. Homeowners should always consult a qualified home inspector or licensed contractor to determine the cause of any water damage or structural framing issues that may be present beneath the surface before attempting any repairs.